
Teachers should also read “How to share your project with a teacher” to understand how sharing works from the student point of view.
To enable your students to share their work with you, create an inbox for each project you assign.
For example, you would create an inbox box titled “G8-1 2018 12thN”. Your G8-1 students would share their “12th Night” project with you through this inbox.
Work submitted to you by your students is accessible in your teacher account on the Projects screen under Inboxes. By creating one inbox for each project you assign, student work is conveniently grouped for evaluation, as shown below.

How to create an inbox
1. In your teacher account, on the Projects screen click the Inboxes tab.
Note: If your folder view does not include Inboxes, you did not select the “I am a teacher or librarian” option when you first created your account. If your account is empty, you can simply create a new account using the correct option. If you have already composed a project within your folder that you wish to keep, contact your account administrator, who can convert your folder to a teacher’s folder through the subscription management area.
2. Click +New inbox.

3. On the New project inbox screen, in the Inbox name enter the name of the inbox. The name must be unique to the school(s) under your NoodleTools subscription but should also be simple enough for students to remember. Including the year and semester are good ideas, to avoid getting it confused with an inbox name for the same project in a different year.
4. If there are other teachers or librarians who need to review and comment on the projects shared with you through this inbox, enter their personal IDs (at WAB this will be their WAB email address) under Additional recipients. They will see the shared projects on their Inboxes screen, just as you do.
5. Modify notecard instructions: Click the link "Show" to customize the text in the fields for "Direct Quotation," "Paraphrase or summary," and "My Ideas."
6. Links to display for students: If there are any assignment-related links that you want students who share projects with this inbox to see, enter their description and URL. Some suggestions:
7. Click Submit to add the new inbox to your Inboxes screen.
How to share your inbox information with your students
In order for students to share projects with you, tell the students what assignment inbox name to use. For example, your assignment sheet might say: “Share your work with me using the inbox name: 21-22 G6.3 PHE Spartans.”
Students share a project from their Dashboard screen. See “How to share your project with a teacher.” Before you provide instructions to students, you may want to create a test student folder and share a project, so that you will understand how the process works.
Projects that are shared with you are grouped under Inboxes and sorted by the date of last revision (i.e., projects that have been edited most recently will appear at the top).

To improve readability when you have many classes sharing work with you, the individual projects under each inbox are hidden until you click the inbox’s name link that you wish to view. The projects in that inbox are then show below the inbox name.

To identify the author of each project, the student’s username followed by his or her real name (as they entered it) appears in parentheses in the Shared By column. In the Project title column, you’ll see the names the students gave to their project.
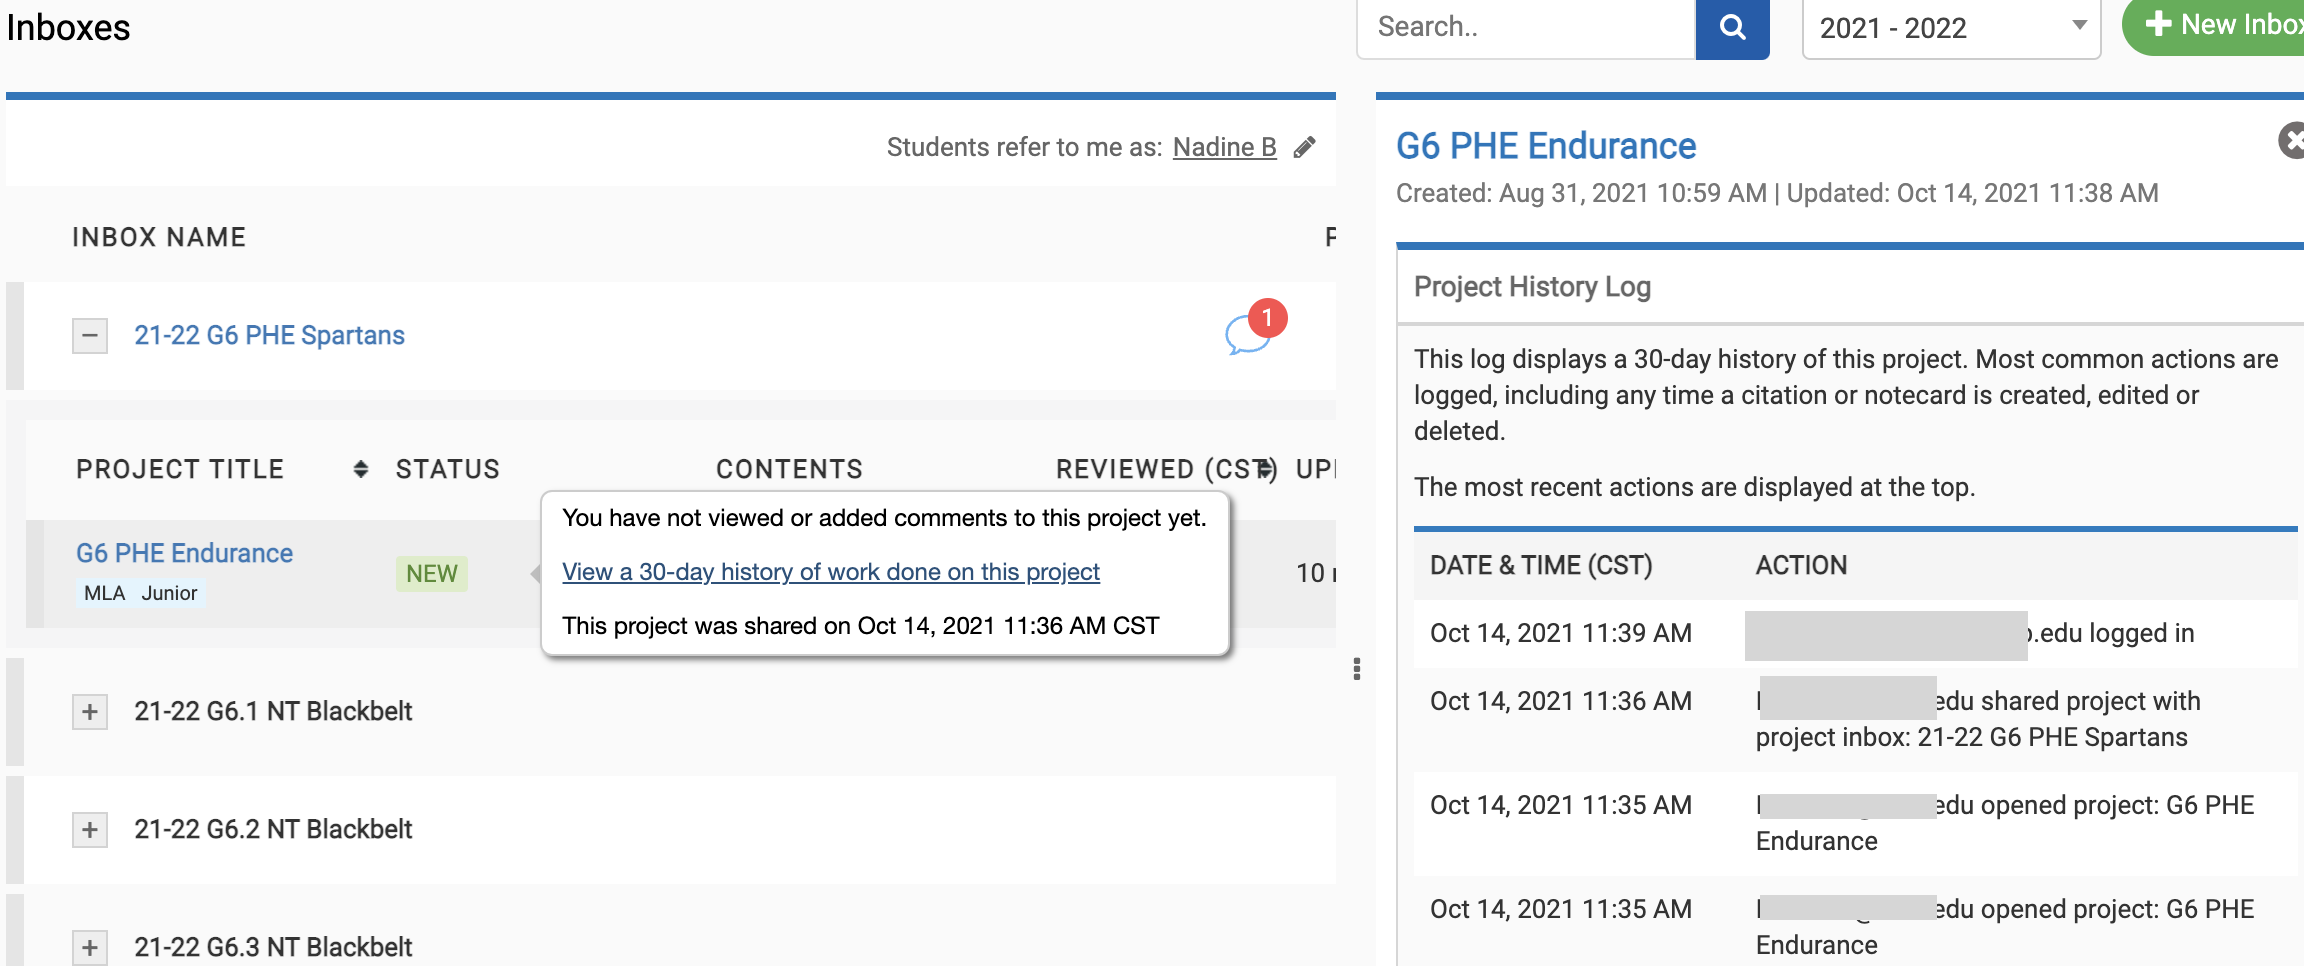
The Status column can have one of three values. Click the link to view a summary of its current status.
NOTE: We do not track whether the student has revised their OneDrive Word paper since you last looked at it, so the status will say “Revised” if the student has only changed their notecards, outline, or source list.
When the status link is clicked, a pop window shows a summary of this project: The status summary provides a link “View a 30-day history of work done this project,” which includes specific times that the author logged in, added/edited/removed citations, added/edited/removed notecards, and more.
NOTE: You can also view the 30-day history log from the Dashboard screen of the student’s project (under History).
The project’s Style (MLA, APA, or Chicago) and Level (Starter, Junior or Advanced) of each project is given, as well as the number of Sources and number of Notes (if the notecards feature is enabled in the administration area). The next two columns indicate the date the project was Created and last Modified.
You can remove a project that has been shared with you by clicking Delete at the right. If you do so, you will not be able to view it unless the student shares the project with you a second time.
Projects shared with you are opened in read-only mode – you can view but not modify the student’s citations, notecards, and outline. There is one exception to this – if a student has shared a Word document paper as part of the project, you do have full edit privilege on that document, allowing you to write comments and/or corrections directly on the document. (When a student shares a paper with you, you will get an invitation email from Word to edit the document.)
On your inbox’s screen, click a student’s project’s title open it. The first screen you will see is the student’s project’s Dashboard.
To identify that you’re viewing the project as a teacher, a "Teacher's view" label appears to the right of the project's title.

To view the project’s sources or notecards, switch to the Sources or Notecards screen.
If the notecards feature is enabled, on the Source screen, the "Show" link in the Notecards column allows you to view notecards associated with a particular entry. To view all notecards that the student has created, click "Show/hide."
To provide feedback to your students' projects, see "Viewing and responding to Comments"
Assignment inboxes from previous school years are archived by date (as opposed to deleting them completely). Prior year's inboxes will not show up in your Project inboxes screen, nor can students share work with it. This eliminates clutter from your screen and students will not be confused seeing inboxes from previous years.
To view a prior year's assignment inbox, toggle the date at the top of the inbox.

You can always view an Inbox to review student work from prior years, to find exemplars to show current students, or to add to their own portfolio.