Skip to Main Content
WAB Faculty & Staff

Tech for Leaving Faculty: Email

Exporting from Email

There are three methods of taking some/all of your email with you detailed below:

  1. Forward selected emails to a new email address
  2. Forward all of your emails to a new email address
  3. Create an email archive to be opened using Outlook (desktop) in the future*

*Exporting emails from Outlook for Mac will give you an .OLM file, which can only be used on other Mac computers.

1. Forward Selected Emails

There may be only a few emails you would like to have access to when you leave. If this is the case:

  1. Select the email(s) you wish to have access to.
  2. Forward the email(s) to your personal account.

2. Forward All Emails

Configure Outlook on the web (at Outlook.com) to automatically forward emails you receive to a different email address.

  1. Select the Settings gear icon in the Outlook on the web toolbar.
  2. Select View all Outlook settings.

     
  3. In the Settings dialog box, select Mail > Forwarding.

     
  4. Select the Enable forwarding check box. 
    Enter the email address that will receive the forwarded email messages.
    If you want to keep copies of the forwarded messages in your Outlook account, select the Keep a copy of forwarded messages check box*.


    *Note: If Keep a copy of forwarded messages is not checked, forwarded mail will not be available in your Outlook account (not even in the Deleted folder)

3. Export from Outlook App

Export items to an archive file in Outlook for Mac

Manually archive email messages, contacts, and other items to an Outlook for Mac Data File (.olm) to easily reduce your inbox size. You can save an .olm file to any location on your Mac or on a different machine for safekeeping.

  1. First, open the Mac App for Outlook (this will not work on the Browser version)
     
  2. Make sure you are on the Old Outlook Experience. To check, go to the top menu bar and click Outlook and make sure you have removed the tick next to 'New Outlook'

     
  3. Click Revert (if necessary)

     
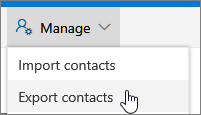
  4. On the Tools tab, choose Export.

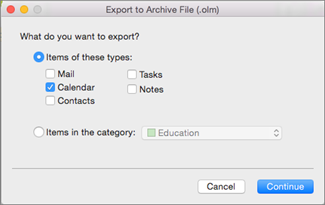
5. In the Export to Archive File (.olm) box, check the items you want to export, and choose Continue.

Check the items you want to export.

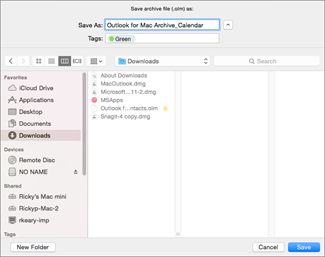
6. In the Save As box choose the Downloads folder, and click Save.

Save the archive file as an .olm.

7. Once your data has been exported, you'll get a notification. Choose Finish.

For information on how to access the data that you've saved in an Outlook for Mac Data File (.olm), see Import email messages, contacts, and other items into Outlook 2016 for Mac.


Exporting Contacts from Outlook

When you export your contacts from Outlook, a copy of your contacts is saved to a CSV file, or other file type. You can then use this file to import your contacts to another email account.

  1. At the bottom of the page, select People to go to the People page.

  2. On the toolbar, select Manage > Export contacts.

    On the toolbar, select Manage and then Export contacts
  3. Choose to export all contacts or only contacts from a specific folder, and then select Export.

  4. At the bottom of the page, select Save to save "contacts.csv" in your default Downloads folder. Or, select the arrow next to Save and select